
Blog Layout
How To Install Landscape Edging Made To Last
Zach Jones • January 18, 2025
Are you tired of the sinking and shifting of your landscape edging? If so, we got you covered
Landscape edging can look great at first, but over time can become an eye sore from shifting and sinking. Over the past few years, we have been perfecting how we install our edging in order for it to last as we were having the same problems like everyone else. A lot of the times, through different resources, it is taught to install edging on the bare ground (soil) or install the edging on a little bit of base, which is not the greatest way to do it. Even installing the edging on base is not enough in creating a durable installation. That is why we came up with our method.
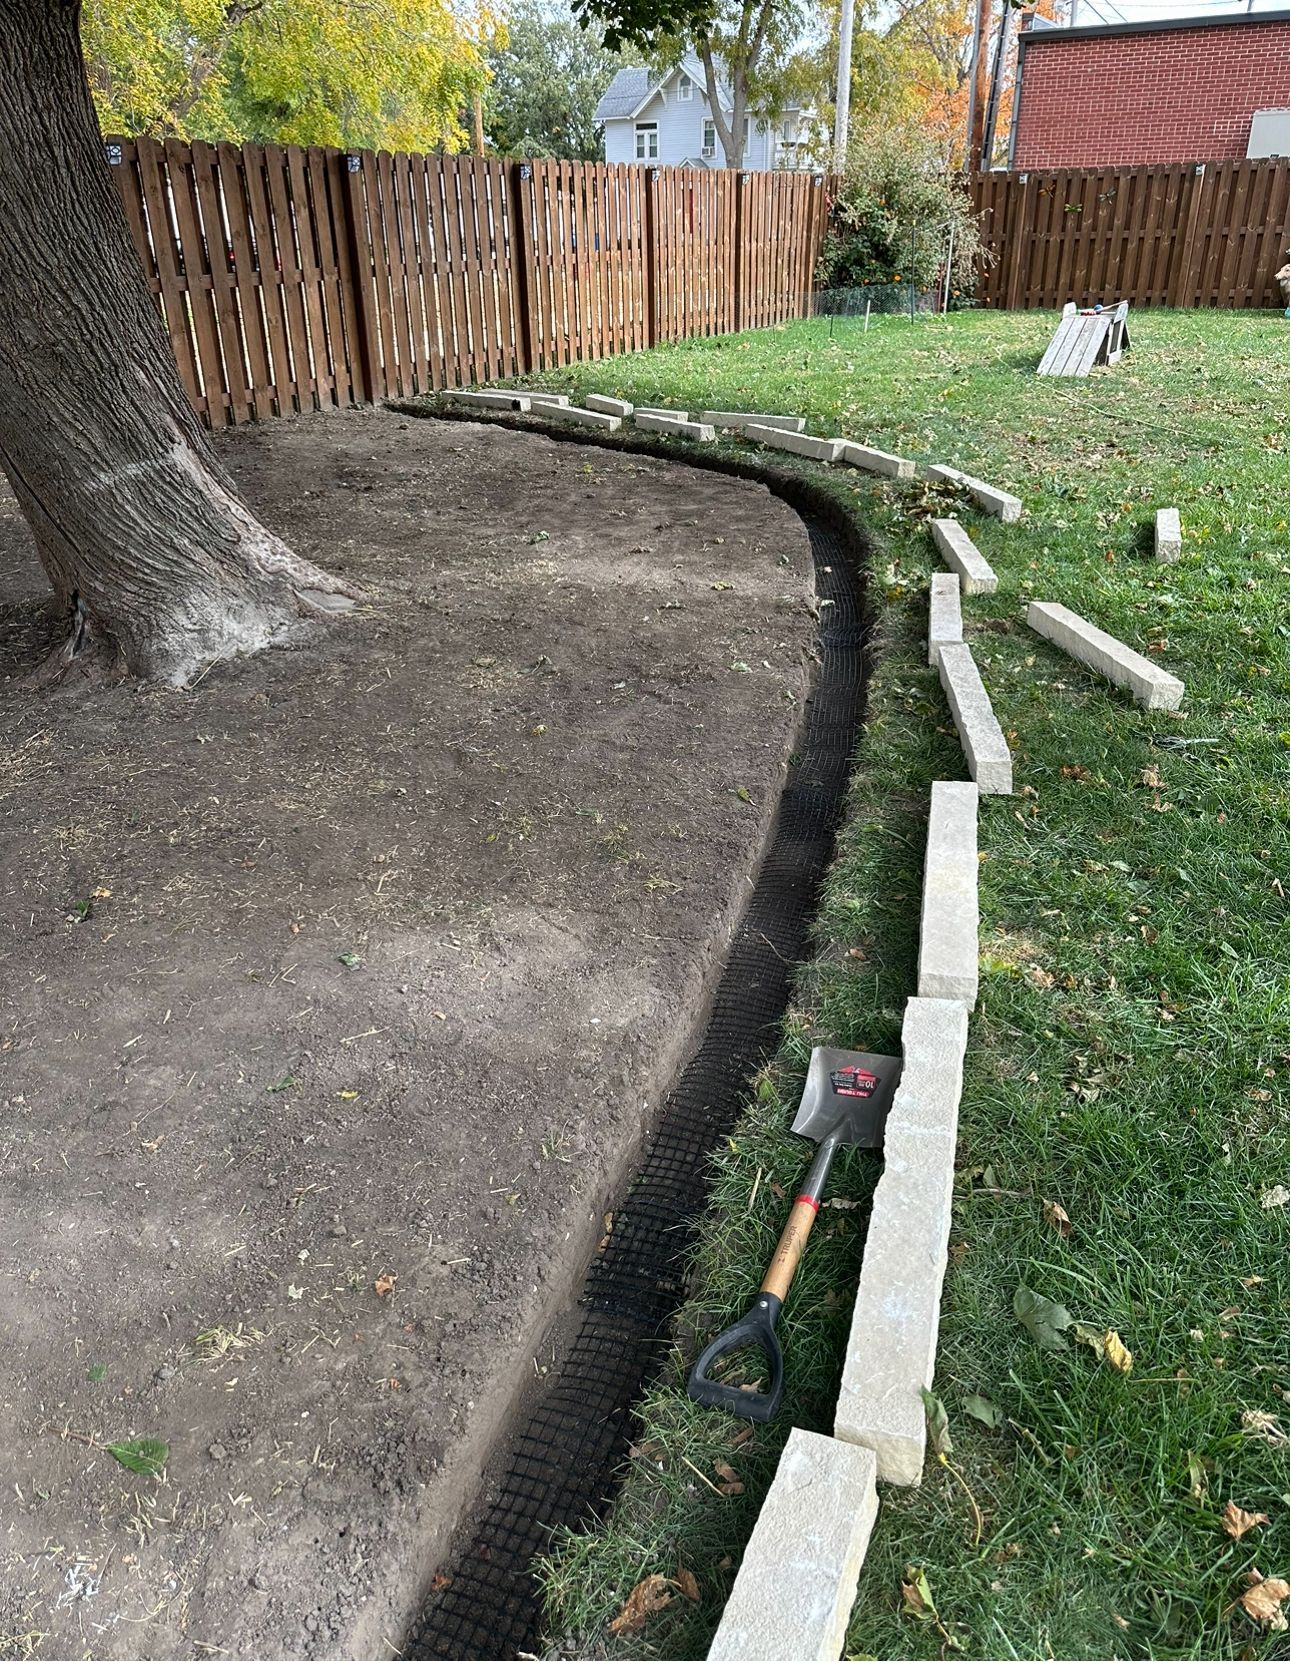
1. First, we create a trench with our brown trench master. You can usually find one of these at your local rental store for about $100 for the day. Make sure that yo use the curbing rotor that creates a 9" wide trench. The above picture shows what the trench will look like after removing the soil. MAKE SURE TO DO AN 811 CALL before using the machine. It is a free service and the last thing you want to do is to strike any utility lines.
.
2. Secondly, install a bi-directional geo-grid at the bottom of the trench. This helps provide reinforcement. Make sure every piece is over lapped.
3. Thirdly, Install base material. We prefer 1" or 3/4" clean rock. Usually comes out to about 2-3" of rock you will put into the trench. It just depends if you want your edging slightly above ground or level to the ground. Compact the base material with a hand tamper or compactor. We use a compactor when we compact the base material. If you are hand tamping the base material, would highly recommend using clean stone as it is easier to compact vs 3/4" road stone base, which you find commonly at the big box stores in the bags.
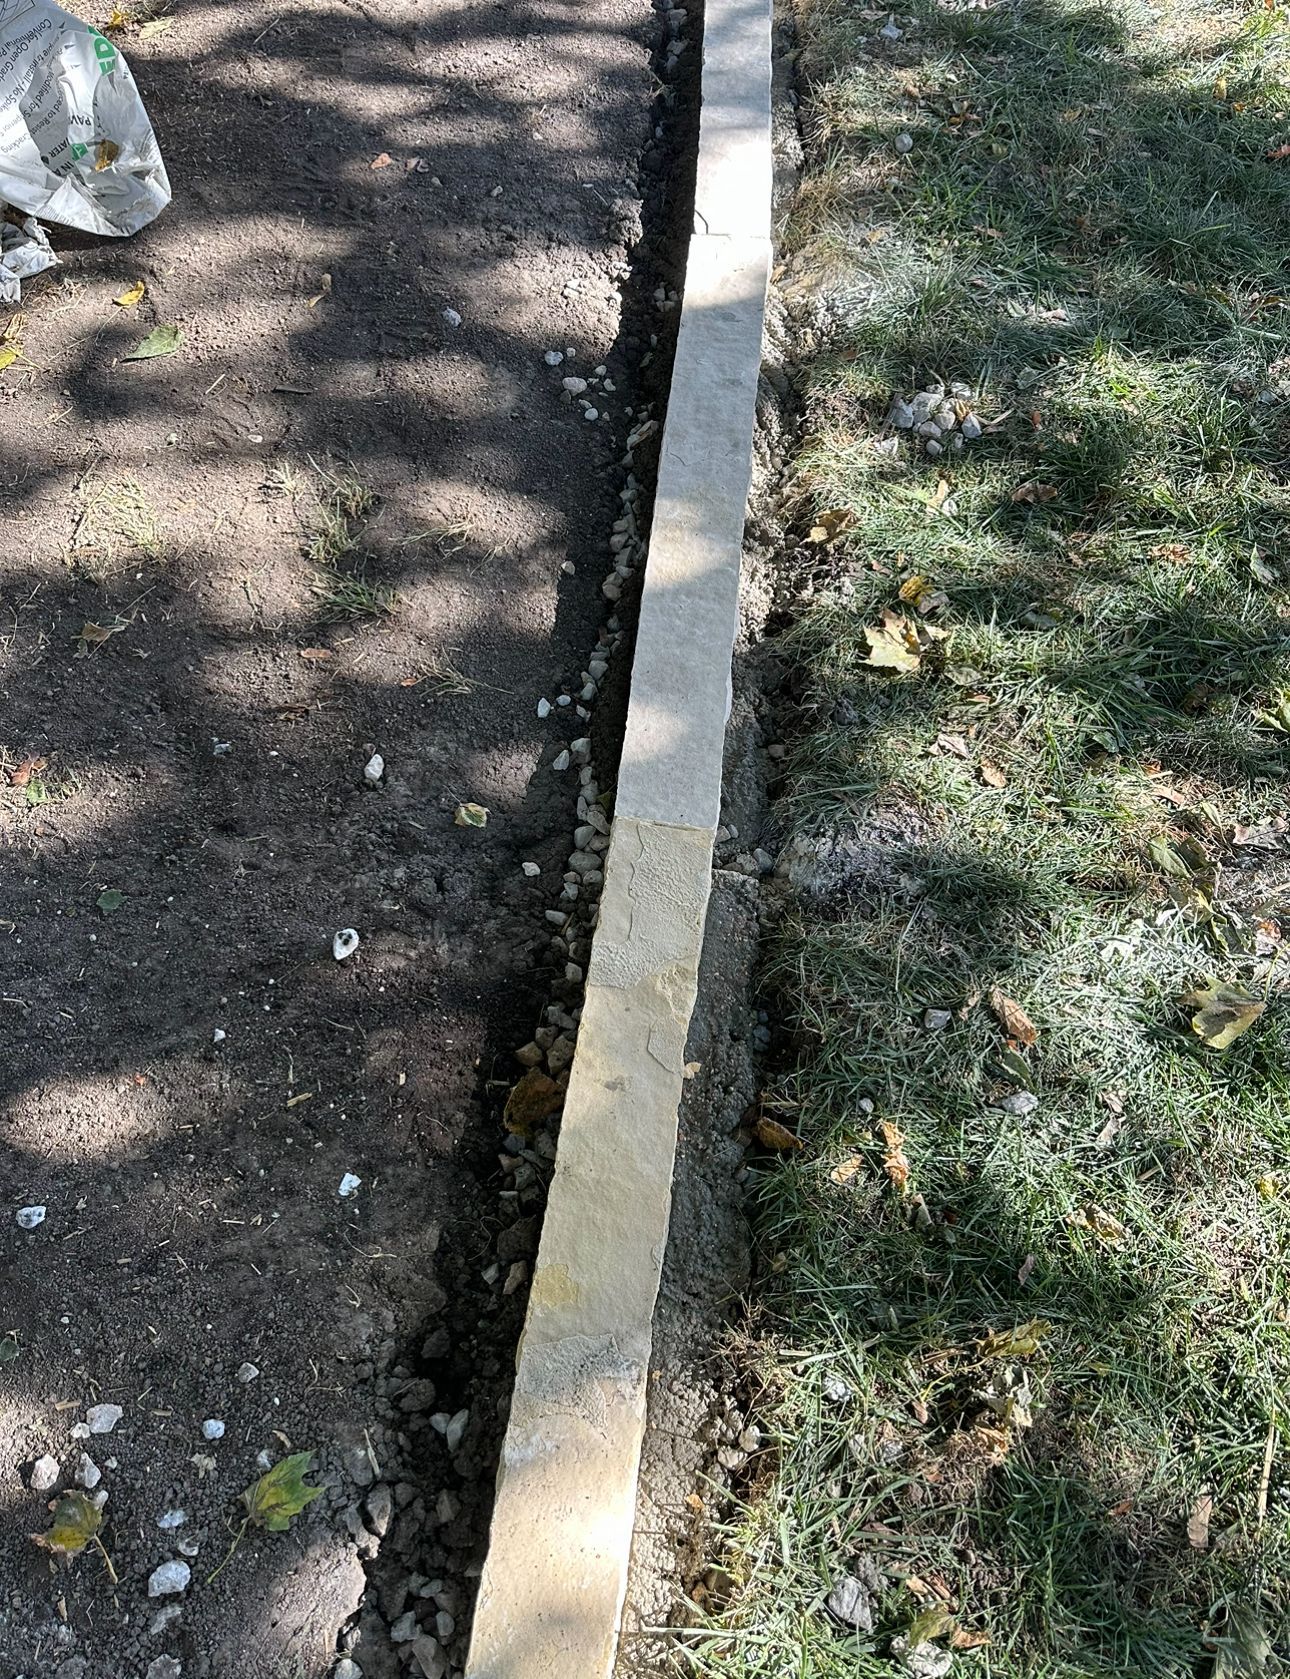
4. Lastly, After compacting the base, we like to install a layer of Edge Crete. This can be more difficult to find if your a homeowner, but in most cases, big box stores have their own version that they sell. If you are in the Iowa area, Kings Material sells Edge Crete. you will then install the edging on top of the Edge Crete, pounding the edging into it. This will create a suction cup to the base material underneath the edging and edging next to each other. After drying, you should not be able to move the edging. If you are able to move the edging, install the Edge Crete on the outer edges to lock the edging in. Be careful to not go overboard with the Edge Crete up the sides of the edging as you need enough room for dirt and grass seed on the outer side of the edging. That was a problem we faced at the beginning when we first starting installing our edging this way. Take the time to do the Edge Crete as good as possible because once it drys, it make it a little difficult to make fixes. Picture down below shows the edging with the Edge Crete.
Professional landscaping, lawn care, and hardscaping in Tipton, IA. Call (563) 241-8462 today to transform your outdoor space!
Expert landscaping, lawn care, and hardscaping services in Tipton, IA. Contact us now at (563) 241-8462 for a beautiful yard!

Transform your outdoors with landscaping, lawn care, and hardscaping in Tipton, IA. Call (563) 241-8462 for expert services!


